How to Fix the “Secure Boot State Unsupported” Error in Windows 11
3 min read
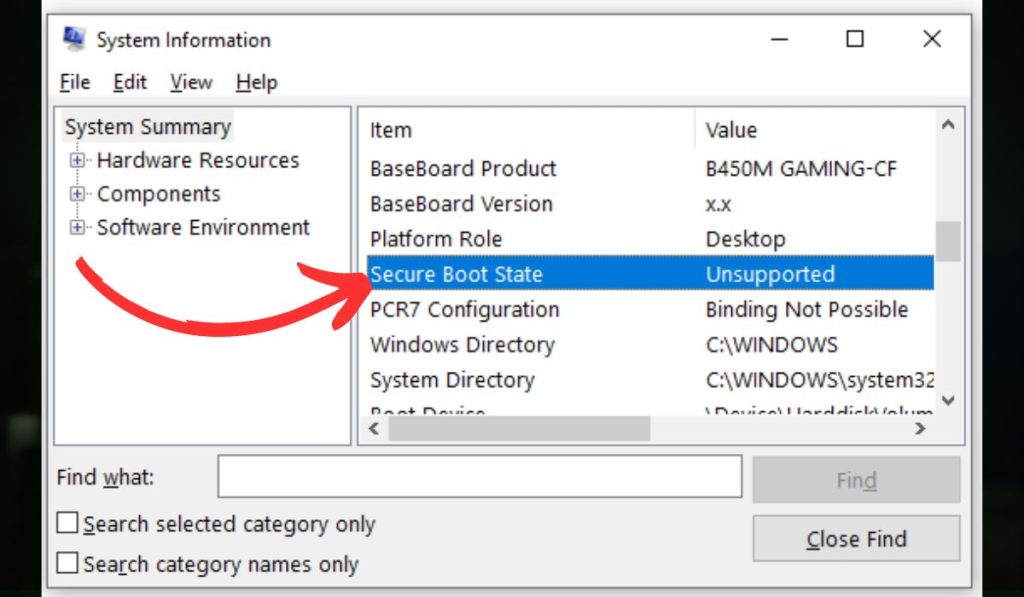
Have you ever tried to install Windows 11 and seen a Secure Boot error? It can be frustrating, but don’t worry—you can fix it! This guide will show you easy steps to solve the Secure Boot issue so you can keep using your computer without any trouble.
What is Secure Boot in Windows?
Secure Boot is a feature in your computer’s BIOS or UEFI settings. It helps keep your computer safe by only allowing trusted software to run when you start up. Windows 11 requires Secure Boot to be turned on for better security.
Why Do You Get Secure Boot Errors?
There are a few reasons why you might see a Secure Boot error:
- BIOS/UEFI Settings: Secure Boot might not be turned on.
- Wrong Boot Mode: Your computer might be in Legacy mode instead of UEFI mode.
- Outdated BIOS/UEFI: The BIOS firmware might be outdated.
How to Fix the Secure Boot Error in Windows 11
Here are some simple steps you can follow to fix the Secure Boot error:
1. Enter BIOS/UEFI Settings
To fix the Secure Boot error, you first need to enter your computer’s BIOS or UEFI settings. This is where you can change the Secure Boot options.
- Restart your computer.
- Press the key to enter BIOS/UEFI (usually F2, F10, or Delete).
- Find the Secure Boot option and make sure it’s Enabled.
2. Switch to UEFI Boot Mode
If your computer is in Legacy mode, it won’t support Secure Boot. You need to make sure it’s in UEFI mode.
- In the BIOS/UEFI, check if your computer is set to UEFI Mode instead of Legacy Mode.
- If it’s in Legacy Mode, switch it to UEFI and save the changes.
3. Update BIOS/UEFI Firmware
Sometimes, an outdated BIOS/UEFI can cause Secure Boot errors. Updating it might solve the problem.
- Check your computer manufacturer’s website for a BIOS/UEFI update.
- Follow their instructions to update to the latest version.
4. Disable Fast Boot
Fast Boot can sometimes interfere with Secure Boot. Disabling it might help fix the error.
- In the BIOS/UEFI settings, find Fast Boot and disable it.
5. Reset Secure Boot Keys
Resetting Secure Boot keys to factory defaults can make sure everything is set up correctly.
- Go to the Secure Boot section in BIOS/UEFI.
- Choose Reset to Factory Default to make sure the keys are correct.
6. Reinstall Windows 11 in UEFI Mode
If none of the above steps work, you may need to reinstall Windows 11 in UEFI mode.
- Make sure you boot your installation media in UEFI Mode.
Tip: Always save your changes before exiting BIOS/UEFI to make sure everything works properly!
Preventing Secure Boot Errors in the Future
- Keep BIOS Updated: Always update your BIOS when new versions are available.
- Use UEFI Mode: Make sure your computer stays in UEFI Mode if you’re using Windows 11.
Ethical Considerations: Secure Boot is there to protect you from harmful software. Make sure to follow these steps carefully and don’t make unnecessary changes that could affect your computer’s security.
Conclusion
Fixing the Secure Boot error in Windows 11 may seem challenging, but by following these simple steps, you can solve the problem and get your computer running smoothly again. Secure Boot is an important security feature that helps keep your computer safe, so it’s worth taking the time to set it up correctly. Remember to keep your BIOS updated and always use UEFI mode for the best experience.
We hope this guide was helpful! If you have any questions or run into issues, feel free to leave a comment below. Also, don’t forget to share this article with others who might need it, and subscribe for more easy tech guides to keep your devices running their best!